How to Care for a Bromeliad Plant
Harry Bourke • March 16, 2024

Father’s Day is a special occasion dedicated to honouring the paternal figures in our lives. It’s a day when we express our love, gratitude, and appreciation for everything our fathers have done for us. Traditionally, people have celebrated this day with various gifts, and while ties and tools are typical presents, one thoughtful and […]

Gift Basket for Dad Father’s Day is not just another day on the calendar; it’s an occasion to celebrate, acknowledge, and express our most profound appreciation for the paternal figures in our lives. These men have shaped our paths, held our hands through storms, and celebrated our victories, big or small. They’ve offered us love […]

Where to Watch Cherry Blossoms in Sydney Welcome to the breathtaking world of cherry blossoms in Sydney! As spring unfolds its colourful tapestry, Sydney transforms into a paradise of delicate pink and white blooms. You’re in luck if you’re eager to witness this mesmerizing spectacle! Sydney boasts several spots where cherry blossoms paint the landscape […]

The Cottagecore trend, inspired by the charm of rural life, has become incredibly popular in both fashion and home décor. Flowers play a big role in this trend, adding natural beauty to gardens and bringing the essence of Cottagecore to life. They symbolize simplicity, tradition, and a love for nature, making them a key element in creating the cozy Cottagecore vibe. But what is Cottagecore and what other elements contribute to the Cottagecore aesthetic? What is Cottagecore? Cottagecore is a trend that romanticizes rural life, drawing inspiration from pastoral settings, traditional crafts, and nature. It celebrates simplicity, nostalgia, and a connection to the natural world. The aesthetic often includes elements such as floral patterns, vintage clothing, homemade goods, and cozy interiors reminiscent of countryside cottages. Cottagecore enthusiasts often embrace activities like gardening, baking, and crafting as part of their lifestyle, seeking to create a sense of comfort, wholesomeness, and escape from modern stresses. Why Cottagecore Theme is a Trend The Cottagecore theme has become a trend for several reasons: Escapism and Nostalgia: Many people are drawn to the nostalgic and romanticized idea of a simple, rural lifestyle in an increasingly digital and fast-paced world. Cottagecore represents an escape from modern complexities and a return to nature and simplicity. Connection to Nature: Cottagecore emphasizes a deep connection to nature, from gardening and foraging to outdoor activities like picnics and walks in the countryside. This resonates with individuals seeking a more sustainable and eco-friendly way of living. Cozy and Comfortable Aesthetic: The aesthetic of Cottagecore is cozy, warm, and inviting. It celebrates traditional crafts, vintage decor, and homemade goods, creating a sense of comfort and homeliness that many find appealing. Self-Sufficiency and DIY Culture: Cottagecore promotes self-sufficiency and a DIY mindset, encouraging people to grow their own food, make their own clothes, and create their own cozy spaces. This aligns with trends towards sustainability, minimalism, and conscious consumption. Social Media and Influencers: The popularity of Cottagecore has been amplified through social media platforms like Instagram and TikTok, where influencers and creators share idyllic images and videos of rustic living, inspiring others to adopt the lifestyle. Pandemic Influence: The COVID-19 pandemic also played a role in the rise of Cottagecore, as lockdowns and restrictions led many to seek solace in nature, gardening, and home-based activities. Cottagecore offered a way to find joy and beauty in simple pleasures during challenging times. What is Cottagecore Gardening? Cottagecore gardening is all about creating a charming and natural garden that feels like it’s straight out of the countryside. It’s filled with flowers, herbs, and veggies, arranged in a way that looks wild and whimsical. Think roses, lavender, and daisies growing in a relaxed, informal style. You might also find rustic structures like arbors and pathways, adding to the cozy, nostalgic vibe. Cottagecore gardening is about making a peaceful outdoor space that feels like a retreat into nature’s embrace. Top 10 Cottagecore Flowers for Your Garden 1. Lavender With its iconic purple hue and soothing fragrance, the lavender plant is a Cottagecore staple. Not only is it aesthetically pleasing, but its care is relatively straightforward. Thriving in well-draining soil and full sun, lavender is a natural insect repellent. 2. Foxgloves Tall, striking, and almost fairy-tale-like, foxgloves bring a touch of whimsy to any garden. They prefer partial shade and well-draining soil. Their bell-shaped flowers are not only captivating but also attract pollinators. 3. Daisy Daisies, with their simple charm, are reminiscent of childhood days spent in meadows. They are adaptable, resilient, and bloom prolifically. Daisies require full sun and moderate water, and they often reseed themselves, offering surprise blooms year after year. 4. Hollyhock These towering beauties are reminiscent of old cottage gardens. Hollyhocks thrive in full sun and need well-draining soil. Their large, colourful blooms make them a focal point in any Cottagecore-inspired space. 5. Roses (especially antique varieties) What garden is complete without roses ? Antique varieties, with their heady fragrances and layered petals, fit the Cottagecore aesthetic perfectly. While they require more attention, the results—a garden filled with enchanting blooms—are worth it. 6. Peonies Lush, fragrant, and undeniably romantic, peonies are a springtime favourite. They thrive in well-draining soil and full sun, but once established, they are quite hardy and can bless your garden with blooms for decades. 7. Cosmos Cosmos, with their delicate petals and tall, slender stems, dance gracefully in the breeze. They’re drought-tolerant, love full sun, and can easily reseed themselves. 8. Wisteria This cascading beauty, with its clusters of fragrant purple or white flowers, is perfect for pergolas or trellises. Wisteria requires a sturdy support structure and should be pruned regularly to maintain shape. 9. Poppies With their paper-thin petals, poppies bring a pop of colour to gardens. They’re easy to grow from seeds and prefer well-drained soil and full sun. 10. Clematis Clematis vines, known for their vibrant blooms, are perfect for climbing up trellises or fences. They prefer their feet in the shade and their heads in the sun, making them versatile and easy to place in gardens. Key Takeaways It creates a charming, rustic, and naturalistic garden space reminiscent of rural landscapes. Cottagecore gardens feature an abundance of flowers, herbs, and vegetables. Plants are arranged informally to mimic the wild and whimsical look of cottage gardens. Elements like heirloom varieties, roses, lavender, and daisies are commonly found. Traditional garden structures such as arbors, trellises, and pathways are incorporated. The focus of cottagecore is on creating a peaceful and enchanting outdoor retreat for relaxation and connection with nature. For more flower trends and useful tips, don’t forget to follow our blogs . We’re here to keep you updated and inspired as you explore the wonderful world of flowers. Happy reading! FAQs Q: Can I Mix Other Plants With These Flowers? Absolutely! Cottagecore celebrates diversity in gardens. Ferns, herbs, and vegetables can seamlessly blend with the flowers for a richer tapestry. Q: Where Can I Buy Authentic Cottagecore Garden Ornaments? Local antique stores, flea markets, or online platforms like Etsy are ideal for sourcing unique, vintage garden ornaments. Q: How Do I Protect My Cottagecore Flowers From Pests? Focus on natural solutions. Introduce beneficial insects, plant companion plants that deter pests, or use organic sprays like neem oil.

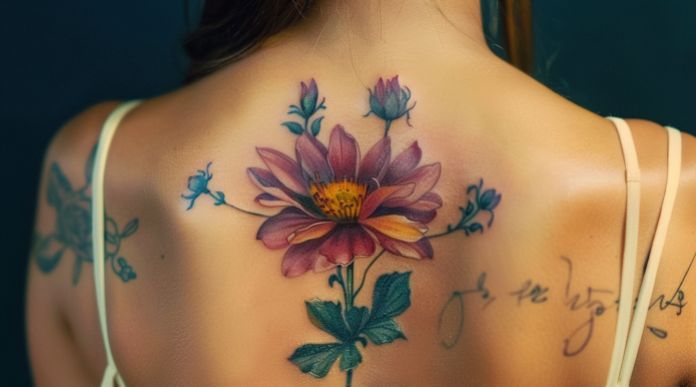
Flower tattoos are a favorite among tattoo lovers and those thinking about getting their first ink. These tattoos are not just beautiful but also rich in meaning, making them a perfect choice for anyone. But what do flower tattoos mean and symbolise? Let’s find out. What does a flower tattoo symbolize? Flower tattoos hold a special place in the world of body art, often chosen for their beauty and deep symbolism. Each type of flower carries its own unique meaning, making them powerful personal statements. Growth and transformation: Much like flowers bloom and flourish, these tattoos can represent personal development and new beginnings. For instance, someone chose a lotus flower tattoo after overcoming a difficult period in her life. The lotus, which grows beautifully out of muddy waters, mirrors her journey of rising above challenges and finding clarity. Honoring connections: Others select flower tattoos to honor their connections to loved ones. For example, a devoted son, got a rose tattoo in memory of his late mother, who adored the flower. For him, the rose serves as a constant reminder of her love and presence in his life. Cultural and historical significance: For example, cherry blossoms are celebrated in Japanese culture for their fleeting beauty and are often associated with the transience of life. Someone who spent time living in Japan, chose a cherry blossom tattoo to commemorate her experiences and the lessons she learned about embracing each moment. Connection to nature: Many find peace and balance in these designs, feeling a deeper sense of harmony with the natural world. For instance, an avid gardener has a sleeve of various flowers that reflect his passion for nurturing life and his appreciation for nature’s beauty. What Flowers to Choose for Tattoos and Their Meanings Here’s a guide to some popular flowers and their symbolism to help you make a thoughtful choice. Rose Love, Passion, Beauty The rose is a timeless symbol of love and romance. Its intricate petals and sharp thorns also represent the balance between beauty and pain. It’s perfect for those who want to celebrate love or honor someone special. Lotus Enlightenment, Rebirth, Purity The lotus grows in muddy waters but emerges pure and beautiful. This makes it an excellent symbol for overcoming adversity and achieving spiritual enlightenment. It’s ideal for those who have gone through significant personal growth. Cherry Blossom Transience, Renewal, Beauty Cherry blossoms are celebrated in Japanese culture for their fleeting beauty, representing the transient nature of life. This flower is great for those who embrace the idea of living in the moment and appreciating life’s delicate beauty. Sunflower Positivity, Happiness, Loyalty Sunflowers turn towards the sun, symbolizing positivity and warmth. They’re a wonderful choice for anyone who radiates optimism or wishes to keep a sunny outlook on life. Lily Purity, Renewal, Fertility Lilies are often associated with purity and renewal. They’re frequently chosen to commemorate new beginnings, such as a new chapter in life or the birth of a child. Peony Prosperity, Honor, Romance In many cultures, peonies are a symbol of good fortune and honor. Their lush, full blooms also make them a romantic choice, perfect for those who wish to celebrate prosperity and romantic affection. Daisy Innocence, Simplicity, Joy Daisies are known for their simplicity and cheerful appearance. They symbolize innocence and purity, making them a great choice for those who value simplicity and joy in life. Orchid Luxury, Strength, Beauty Orchids are exotic flowers that symbolize rare beauty and strength. They’re ideal for individuals who see themselves as unique and resilient. Violet Modesty, Faithfulness, Virtue Violets are often associated with modesty and faithfulness. They’re a lovely choice for those who value humility and integrity. Marigold Passion, Creativity, Courage Marigolds, with their vibrant colors, symbolize creativity and courage. They’re perfect for those who wish to express their vibrant personality and boldness. Choosing the Right Flower Tattoo for You When selecting a flower tattoo, it’s essential to consider not only the aesthetic appeal of the design but also the deeper meanings it holds for you. Here are a few tips to help you choose the perfect flower tattoo: Take the time to research the symbolic meanings associated with different flowers. Choose a flower that resonates with your values, experiences, or aspirations. Consider where you want to place your tattoo and how it will complement your body’s natural contours. Certain flowers may lend themselves better to specific body parts, so consider the overall aesthetic you’re aiming for. Don’t be afraid to customize your design to make it uniquely yours. Incorporating elements like colour, size, and additional imagery can add layers of personal meaning to your tattoo. Popular Flower Tattoo Designs Watercolor Flowers One of the most enchanting trends in tattoo artistry is using watercolour techniques to create vibrant, ethereal designs. Watercolour flower tattoos often feature soft washes of colour and delicate brushstrokes, giving them a dreamy, painterly quality. Black and Gray Floral Portraits For those drawn to a more classic aesthetic, black and grey floral portraits offer timeless elegance and sophistication. These intricate designs capture the intricate details of flowers with stunning realism, making them appear like they’ve been plucked straight from a botanical illustration. Geometric Floral Patterns Combining the beauty of nature with the precision of geometric shapes, geometric floral tattoos offer a modern twist on traditional flower designs. These symmetrical, intricately patterned tattoos blend organic and geometric elements, creating visually striking compositions. Key Takeaways People get flower tattoos for their personal significance, beauty, and intricate designs. These tattoos often symbolize resilience, recovery, and personal transformation, especially in mental health. Flower tattoos carry deeply meaningful stories of personal growth, honoring loved ones, and embracing cultural ties. If you want to learn more about flowers and their meanings, be sure to check out our blogs for the latest insights and inspiration. FAQs Q: What is the best spot for a flower tattoo? The best spot for a flower tattoo depends on the design and your personal preference. Popular spots include the forearm, wrist, shoulder, ankle, and back. These areas provide a good canvas for detailed designs and can be easily shown or concealed. Q: What goes with flower tattoos? Flower tattoos pair well with various elements like vines, leaves, butterflies, birds, and geometric patterns. Combining flowers with these elements can create a unique and personalized tattoo that enhances the overall design. Q: How painful are flower tattoos? Pain levels can vary depending on placement, size, and individual pain tolerance. Generally, areas with less fat or muscle, such as the ribs or feet, tend to be more painful than fleshy areas like the upper arm or thigh. Q: How do I ensure my flower tattoo ages well? To maintain the vibrancy and integrity of your flower tattoo over time, follow proper aftercare instructions provided by your tattoo artist. Protecting your tattoo from prolonged sun exposure can help prevent fading and preserve its beauty for years.

Maintaining a strong and loving relationship can be challenging in today’s fast-paced world, especially when you have busy schedules. However, with some thoughtful strategies and romantic gestures, you can keep the love alive and thriving. But, what are these thoughtful strategies and romantic gestures? Let’s find out. Prioritise Quality Time Together Schedule Regular Date […]


